
VyOS Configuration and Installation
This post will cover the VyOS configuration for a home lab using a standard Zone layout. The installation and configuration should take about 1 hour.
What is VyOS? VyOS is a forked version of the Vyatta router that was bought by AT&T in 2017. Since it was bought, Vyatta is no longer available to download (or at least I cannot find a copy anywhere). VyOS created a forked (or mirror) of Vyatta and have been supporting this product ever since.
This means VyOS is very similar to the original. One key difference is VyOS is all CLI where Vyatta has a GUI. For people new at programming a router, this matters but hopefully this article will help.
Here is a downloadable PDF VyOS cheat sheet version for you to keep. Visit often to get an updated version as I am always adding additional commands and features to it.
Design
Having a properly designed network will make all the difference in how your lab will work. The core of any network is always the router or Firewall.
The standard network layout is to use Zones in your configuration. A network zone is just pre-defining how you will secure and control communications in and out of that network.
There are a lot of different ways to do this and you will find different people use zones slightly differently.
In order to build your virtual network, you need to create at least 4 virtual switches (vSwitches) to accommodate each zone. You will also need to define an IP space for each. Here’s how I did mine.
Security Zones
0-Zone: DHCP. WAN or External Interface
1-Zone: 10.10.10.0/24, DHCP 10.10.10.50-99, (NAT, Internet)
2-Zone: 10.10.20.0/24, DHCP 10.10.20.50-99, (NAT, DMZ)
3-Zone: 10.10.30.0/24, DHCP 10.10.30.50-99, (Prod)
4-Zone: 10.10.40.0/24, DHCP 10.10.40.50-99, (DEV)
At the center of your vSwitches will be a router. I am using Vyatta (VyOS) as a VM/Router/FW that is attached to each vSwitch but this design can be applied to just about any router. This way I can manage the traffic between all zones, provide DNS/FW/DHCP/NAT services to each zone, and support the VM’s networking needs.
I configured the GW to be .1 for each network, a DHCP range between 50-99, and Google DNS (8.8.8.8) for my DHCP DNS server.
I configured Zone 1 and 2 to use NAT to Zone 0 meaning each zone will be able to get to the outside but nothing will come into those zones. Additional FW rules will make sure of it.
Build your vSwitches
To build your switches in MS Hyper-V, go to the “Virtual Switch Manager”.
If this is a new Hyper-V build, you will have one “Default Switch” installed. You can keep that or rename it to one of your zone names. The naming I am using is “Z1-10.10.10.x”, “Z2-10.10.20.x”, “Z3-10.10.30.x”, and “Z4-10.10.40.x”. Each vSwitch is an Internal Network switch.
You will notice once the vSwitches are created, Windows automatically created a virtual NIC to each of those switches on your Windows computer. The next step is to program a static IP address on each of those NICs. DO not program a default gateway.
VyOS Installation
First step to installing anything is to download a copy of the software. You can find it HERE and I am currently using an ISO version 1.1.8 for Intel chips (i586).
Now you just create a VM. These are the specs I am currently using:
- Memory: 512MB
- CPU: 1 Core
- Disk: 5 GB
Depending on your hypervisor product, your steps will vary. Here are the steps I performed using Hyper-V.
1. Create a New VM in your standard location. I like keeping all my VMs under one folder (C:\VirtualMachines) and in a dedicated folder below that. I name my VM with the static IP address to be used (185-CentOS) and I use a hostname of “Server185”.
2. Allocate RAM, CPU, and Disk resources
3. Connect the ISO
4. Select Finish
Now all you need to do is boot your VM and go through the installation steps. Below is a step by step video that will go into this process in detail.
VyOS Configuration
VyOS is a great, small, and powerful router that has all the basic services you want in a small lab. Follow these steps to configure it and don’t forget to change the settings to match your design.
Interface Configuration
To configure the router interfaces, follow these simple steps.
Once you have VyOS installed, the default ID is “VyOS” and the password is “VyOS”.
To configure the router, you need to be in configure mode. Simply type “Configure”.
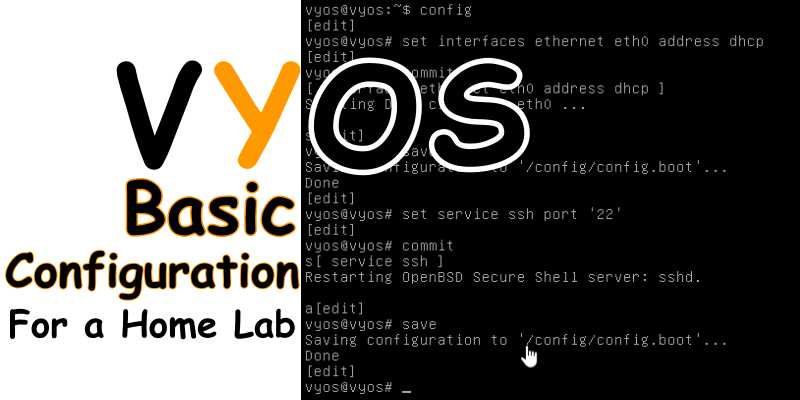
The first thing you will want to do is create a new user ID (and change the password of the old account if this needs to be secured), Setup the Hostname, enable SSH on the router so you can use a regular terminal and get out of the VM console. To do this, type the following. Replace “VyOS-Router”, “admin”, and “password” with anything you want to use.
Basic Setup
This part contains all the basics for your router including turning on SSH, hostname, and changing your password.
Set System Host-Name VyOS-Router
set system login user admin
set system login user admin authentication plaintext-password password
set service ssh port '22'
Commit
Save
Now you will want to configure the Interface with an IP address.
This part is tricky. You need to make sure you have the correct interface connected to the right vSwitch. One way to do this is to add the ports one at a time and reboot between each one. Another possible way is to add them in order (Was, Z1, Z2, Z3, Z4) and they should be assigned to Eth0, Eth1, Eth2, Eth3, and Eth4. There is no guarantee of this so make sure they are correctly assigned or you will have some cleanup work to do later.
Once the interfaces are added, you want to go into configure mode again. You can ignore this if you are already there.
Interface Setup
Every router will have several interfaces and configuring them is pretty easy. Remember you need to be in configure mode whenever making changes like this to your VyOS router.
set interfaces ethernet eth0 description 'External'
set interfaces ethernet eth0 address DHCP

set interfaces ethernet eth1 description 'Zone-1'
set interfaces ethernet eth1 address '10.10.10.1/24'

set interfaces ethernet eth2 description 'Zone-2'
set interfaces ethernet eth2 address '10.10.20.1/24'

set interfaces ethernet eth3 description 'Zone-3'
set interfaces ethernet eth3 address '10.10.30.1/24'

set interfaces ethernet eth4 description 'Zone-4'
set interfaces ethernet eth4 address '10.10.40.1/24'

commit
save
Service Configurations
Router services are things like Firewall, DHCP, NAT, and other advanced configurations beyond routing. They are pretty cool to have but remember to make sure if you add a lot of services, your VyOS will need additional memory or CPU resources to handle it.
DHCP
I suspect most people will be able to skip this step and want to use static IP addresses instead. I find it a great feature to be able to deploy a new VM and not worry about moving it to a static IP until later. Its pretty simple to turn on and setup so I decided it was worth the 5 minutes.
set service dhcp-server disabled ‘false’
set service dhcp-server shared-network-name DHCP-ZONE1 subnet 10.10.10.0/24 dns-server 8.8.8.8
set service dhcp-server shared-network-name DHCP-ZONE1 subnet 10.10.10.0/24 default-router 10.10.10.1
set service dhcp-server shared-network-name DHCP-ZONE1 subnet 10.10.10.0/24 start ‘10.10.10.50’ stop ‘10.10.10.99’
set service dhcp-server shared-network-name DHCP-ZONE1 subnet 10.10.10.0/24 lease 86400
show service dhcp-server

set service dhcp-server disabled ‘false’
set service dhcp-server shared-network-name DHCP-ZONE2 subnet 10.10.20.0/24 dns-server 8.8.8.8
set service dhcp-server shared-network-name DHCP-ZONE2 subnet 10.10.20.0/24 default-router 10.10.20.1
set service dhcp-server shared-network-name DHCP-ZONE2 subnet 10.10.20.0/24 start ‘10.10.20.50’ stop ‘10.10.20.99’
set service dhcp-server shared-network-name DHCP-ZONE2 subnet 10.10.20.0/24 lease 86400
show service dhcp-server

set service dhcp-server disabled ‘false’
set service dhcp-server shared-network-name DHCP-ZONE3 subnet 10.10.30.0/24 dns-server 8.8.8.8
set service dhcp-server shared-network-name DHCP-ZONE3 subnet 10.10.30.0/24 default-router 10.10.30.1
set service dhcp-server shared-network-name DHCP-ZONE3 subnet 10.10.30.0/24 start ‘10.10.30.50’ stop ‘10.10.30.99’
set service dhcp-server shared-network-name DHCP-ZONE3 subnet 10.10.30.0/24 lease 86400
show service dhcp-server

set service dhcp-server disabled ‘false’
set service dhcp-server shared-network-name DHCP-ZONE4 subnet 10.10.40.0/24 dns-server 8.8.8.8
set service dhcp-server shared-network-name DHCP-ZONE4 subnet 10.10.40.0/24 default-router 10.10.40.1
set service dhcp-server shared-network-name DHCP-ZONE4 subnet 10.10.40.0/24 start ‘10.10.40.50’ stop ‘10.10.40.99’
set service dhcp-server shared-network-name DHCP-ZONE4 subnet 10.10.40.0/24 lease 86400
show service dhcp-server
NAT
Network Address Translation just allows you to connect one network to another by translating your IP address to something local to the destination network. This is extremely common in today’s home routers.
set nat source rule 10 outbound-interface 'eth0'
set nat source rule 10 source address '10.10.10.0/24'
set nat source rule 10 protocol 'all'
set nat source rule 10 translation address 'masquerade'

set nat source rule 11 outbound-interface 'eth0'
set nat source rule 11 source address '10.10.20.0/24'
set nat source rule 11 protocol 'all'
set nat source rule 11 translation address 'masquerade'
Don’t forget to commit the changes, save them, then exit the router configure mode.
To reboot the router, type reboot. If you want to power off the router, type PowerOff. You will need to confirm both these commands.
Creating Linux VM’s in Hyper-V
There are a million different OS configurations you can build with a VM and beyond the scope of this article. To help you get started, below is a simple video on how to create a VM in Hyper-V.
In the near future, I will be creating an article on how to create a nested ESXi VM in Hyper-V which is not a simple as you would hope.
Conclusion
The router should be completely up and running now with 5 zones (1 External and 4 Internal Zones 1-4). As you add virtual machines now to each network, you will get a DHCP address and servers inside Zone 1 or 2 will be able to use your laptop’s external NIC and get out to the Internet.
With a vNIC on your windows machine connect to each vSwitch, you will be able to directly connect to each VM and manage or control it as needed. I have found that these vNICs could be a pain if you have them setup with a default gateway. Remember the rule, only 1 default gateway per computer is allowed.
I will add routing and firewall rules to this later as I plan to create a second VyOS router with a WAN VPN and setup routing between 2 virtual locations. This will need to be a separate article in the near future.
Please let me know if you liked this VyOS Configuration article or if you have any questions by leaving me a comment below. If you would like to receive notice when I create new articles like this, don’t forget to signup for my email list. I usually create 2-3 new posts every month about all things Cloud and DevOps.